
-
Your shopping cart is empty!
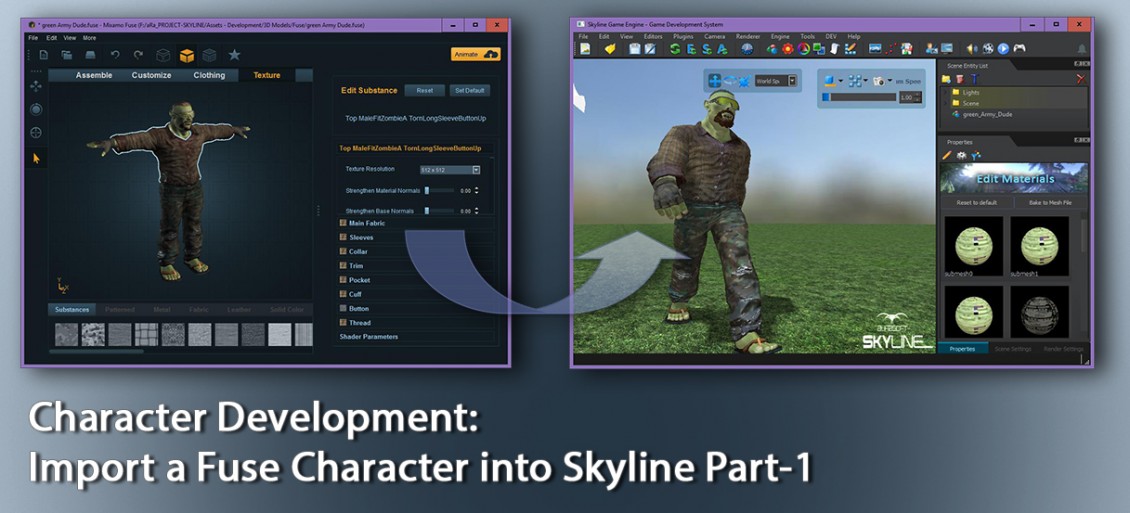
Skyline new and improved asset workflow also gives you a speedy import pipeline for your characters, although the best results are gained by using FBX but the other formats still can bring success generally with a few extra steps in the import process.
So in this tutorial we will be working with FBX models from a well known character development toolset - Mixamo Fuse.
Many of you will already own or if not, will have seen the Fuse character toolset out there in cyberspace. Fuse is a friendly tool that will have you making characters from Urban city folk to Zombies, Orcs and Dwarfs etc.
You can get a free version which will be great for this tutorial as we will be covering importing into Skyline rather than creating your own character as there are many tutorial on this out there. Download Free Fuse here!
So without further ado let's get on with some fun stuff. Open your copy of Fuse and get creative making a character you would like to use in this tutorial.
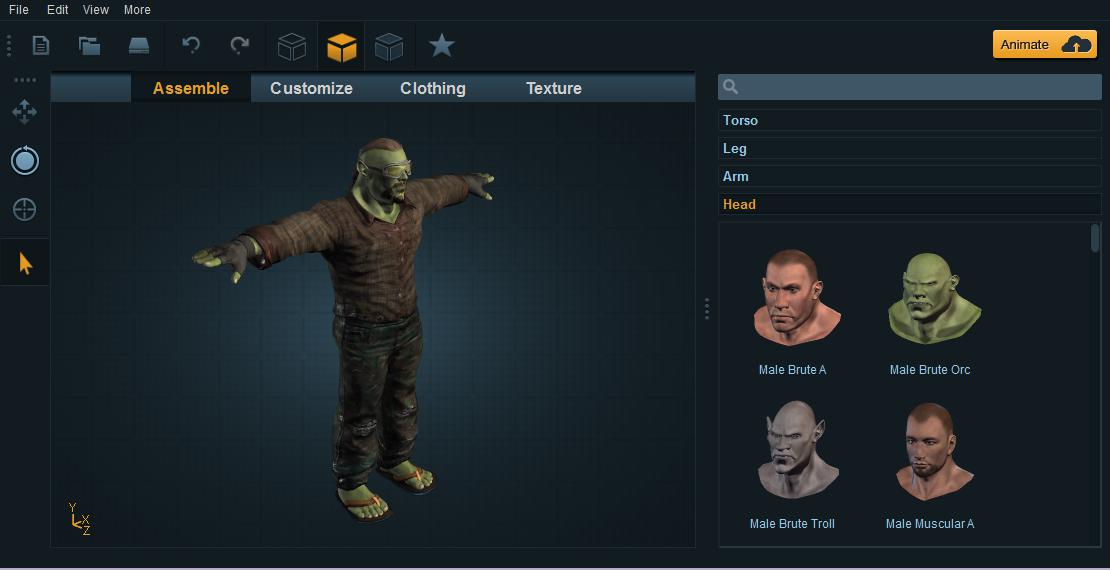
I went for a green ex special forces type living in some tropical outback away from civilisation, generally propping up a bar or two until his services are required. Green! oh yeah its 2045 and we have had contact with many other races who are part of the Alpha Collective of some planet I don't care to remember due to the pain in the backside humanity taxation of 2040. But I digress so back on track.
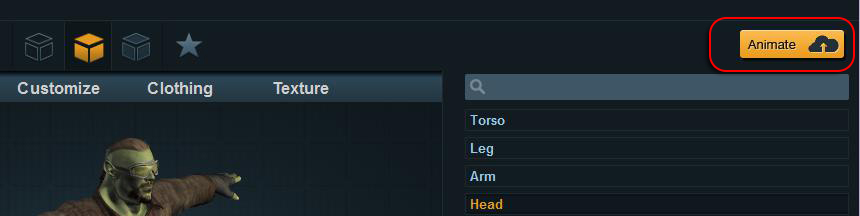
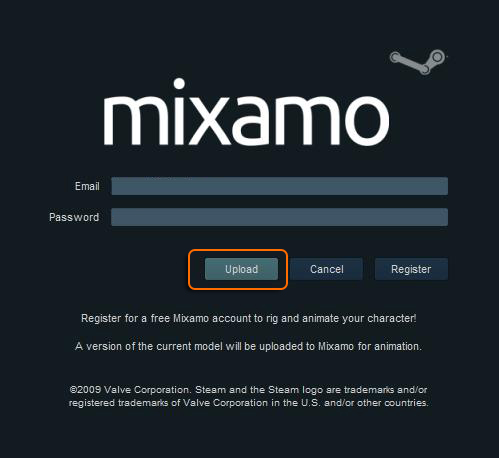
Ok we now have a character next we need to get some animations from the mixamo store. From your copy of Fuse click on the "Animate" Button to take you to the stores animate options. This will open a login form so sign up if now already as you will need this to be able to continue with the tutorial.
Click on the upload option to send your current character upto the mixamo website ready for processing. The website will start to set up your characters autorig just let it do its thing, this may take a few minutes.....
Once the automated rigging process has completed you will see a copy of your model animating with the default anims. Keep the default settings and press the finish button to complete the setup.
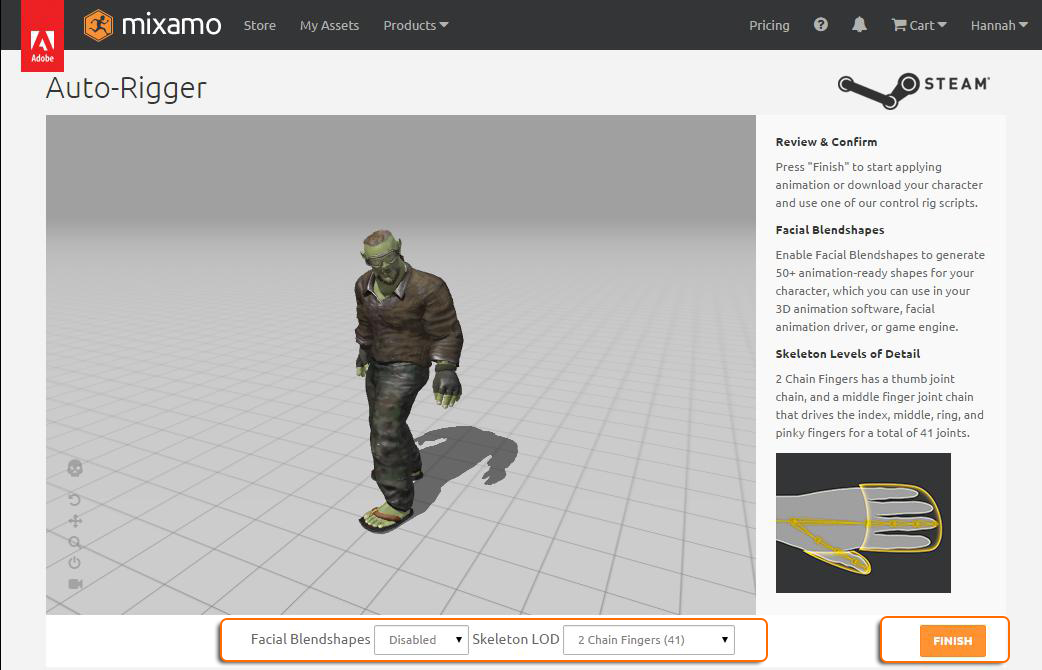
You may have another page showing that the process is complete just click the ok "Animate" Button. Now you are ready to add some animations.
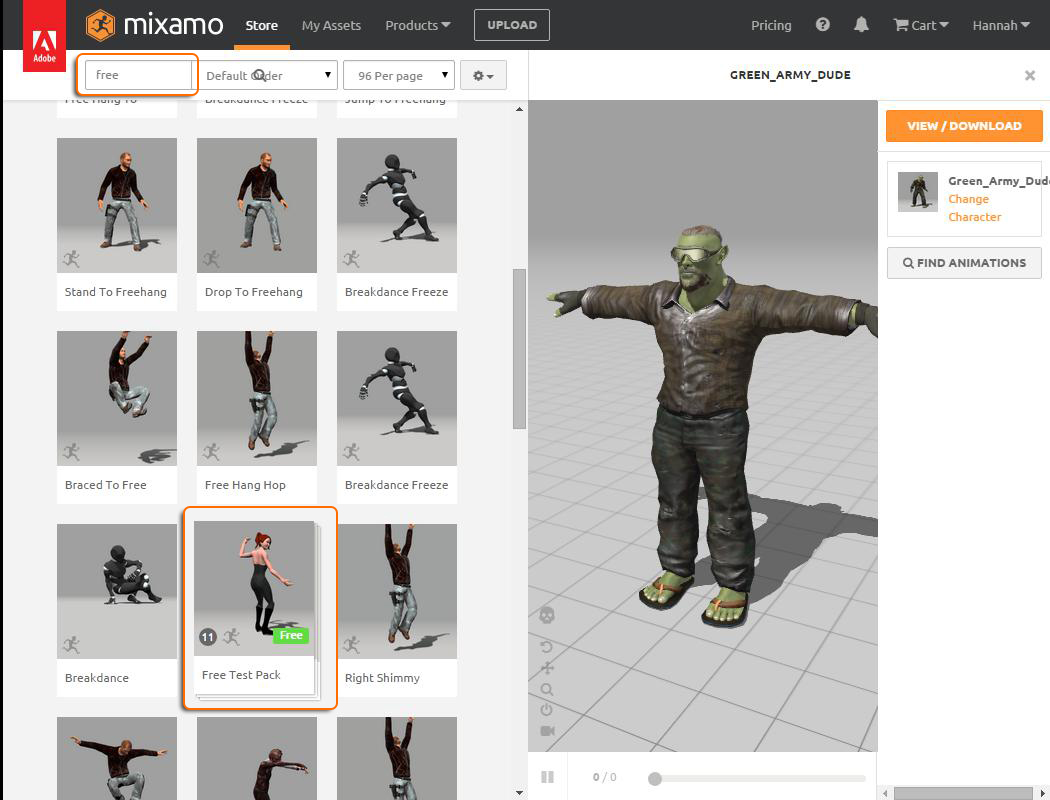
For this tutorial locate the "Search" box [top left of page] and type in "Free" then scroll down to the "Free Test Pack" and select it.
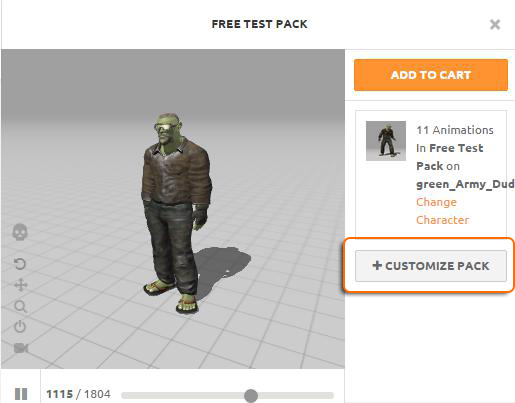
This will add the animation to the character. For preparation of the Skyline import it is important that any animations such as walk, run etc are set to an "In Place" position. Skyline needs the animations to cycle through the animation on the spot, not move across the screen. This is so that when we add a character controller we will have full control over the characters movement.
To do so, open the animation pack we selected, this is only needed on animation packs as single animations will just be added to the character animation list.
Select the "Walking" animation and check the "In Place "box .
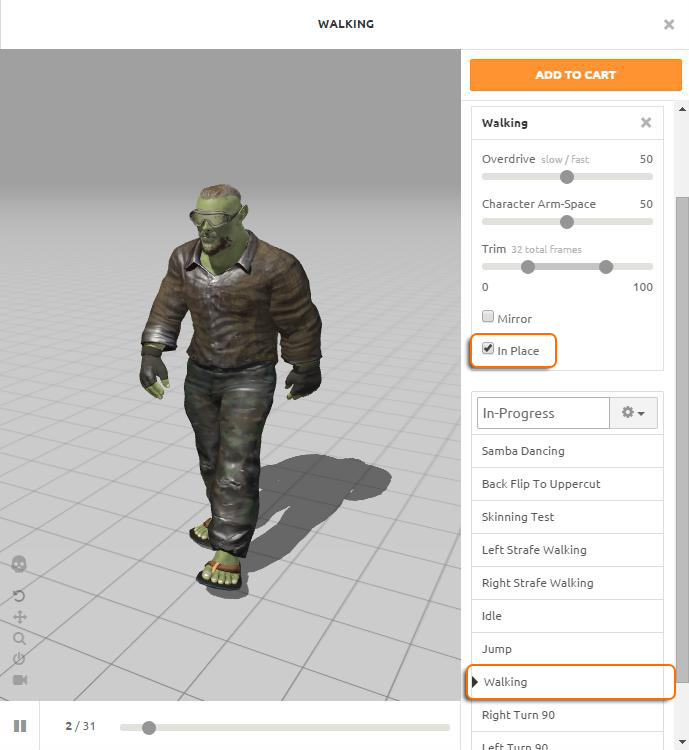
If you are using any of the other free or purchased animations you will also need to select the "In Place" option if they do not keep the character on the spot. So double check each animation to see if this option is available.
Note the "In-Progress" text at the top of the animations, you can change this to any name that would be more in keeping with your character.
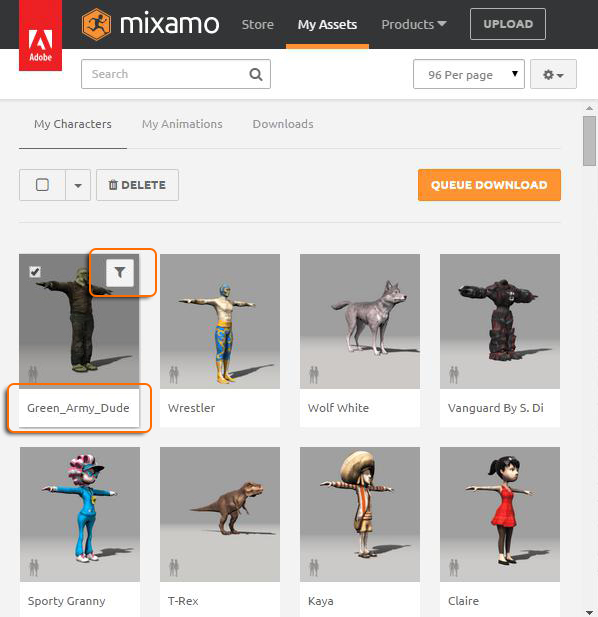
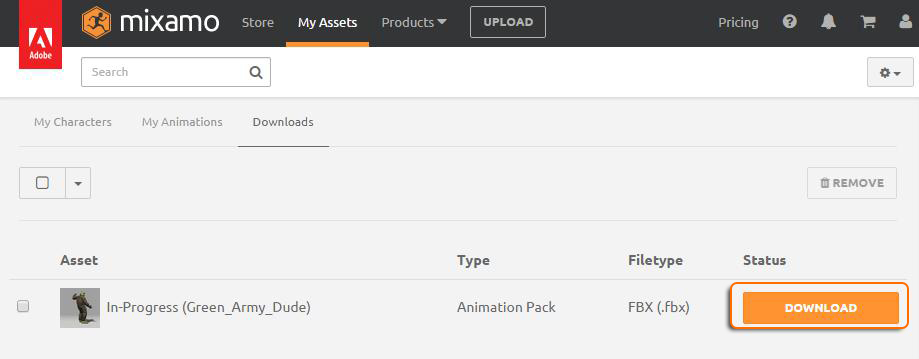
Now you have set up the animations start the download process by clicking add to cart. Complete the cart process to get these added to your library. You will be shown a page displaying the new characters individual animations and the last item will show the complete pack. This is the one we want, so select the the multi version. If for whatever reason you end up on the characters page select the character and click the show animations option, top right of the selected character as seen below.
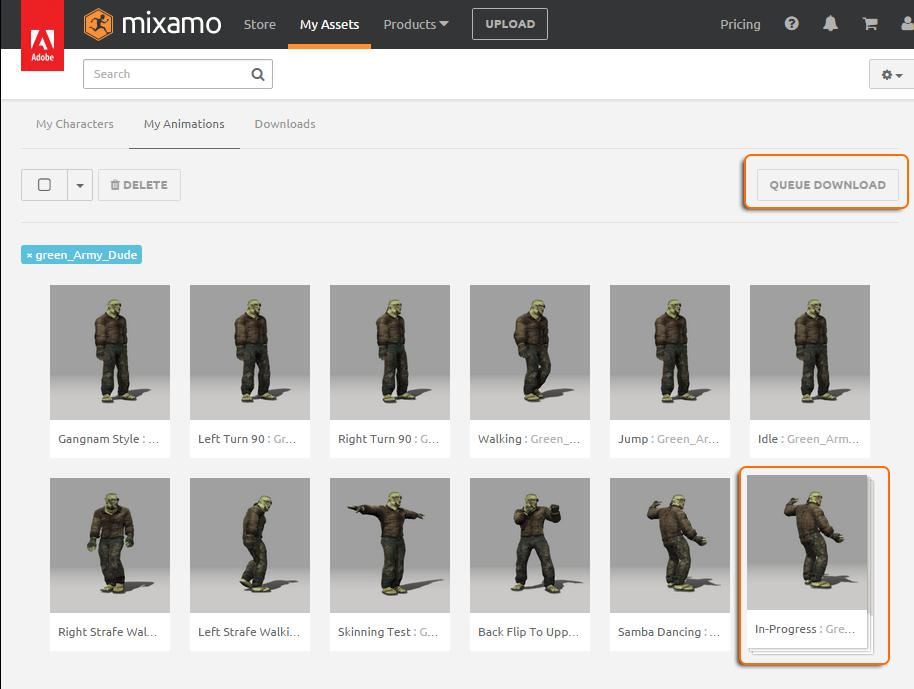
From the library select the multi animation version of your character and click the "Queue Download" button
In the download options panel make sure you use the following FBX settings.
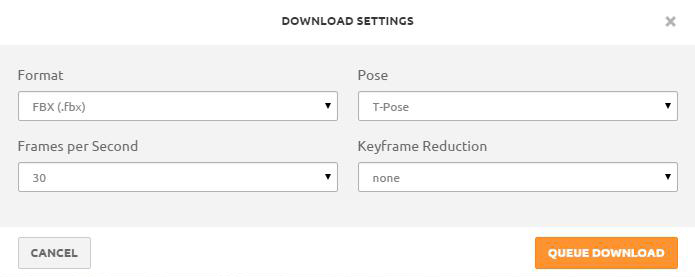
Then queue the download and download to your PC when it's available.
Extract the downloaded Zip file to your Skyline asset library or any folder of your choice. Asset library\Models\Characters\Mixamo\myNewCharacter

You will find fbx files of all your chosen animations and the character, in this case "green_Army_Dude.fbx" all of the other files are just the pure animations that we can build onto our character in side of Skyline. This way you can have a library of animations and add them to any character with a Fuse rig.
I know you are feeling like when is this reading going to end! but as one final parting of wisdom for this page I would like you to note that the character name is very important.
RULE's for clean import:
In Part 2 of this tutorial we will look at how to set up the character inside Skyline. Yay! finally I hear you cry so go have a break and a coffee or something stronger if thats your thing and open Skyline to a new default scene ready for some character fun.
Thank you for reading, have fun! ;)


8 Comment(s)
I really loved reading your blog. It was very well authored and easy to understand. Unlike other blogs I have read which are really not that good.Thanks alot!
Love to read it,Waiting For More new Update and I Already Read your Recent Post its Great Thanks.
Superior post, keep up with this exceptional work. It's nice to know that this topic is being also covered on this web site so cheers for taking the time to discuss this! Thanks again and again!
Very useful post. This is my first time i visit here. I found so many interesting stuff in your blog especially its discussion. Really its great article. Keep it up.
I wanted to thank you for this excellent read!! I definitely loved every little bit of it. I have you bookmarked your site to check out the new stuff you post.
Thank you because you have been willing to share information with us. we will always appreciate all you have done here because I know you are very concerned with our.
Pokemons are very very cute, i would really love to keep one of them in our home~
Pretty nice post. I just stumbled upon your weblog and wanted to say that I have really enjoyed browsing your blog posts. After all I’ll be subscribing to your feed and I hope you write again soon!
Leave a Comment