
-
Your shopping cart is empty!
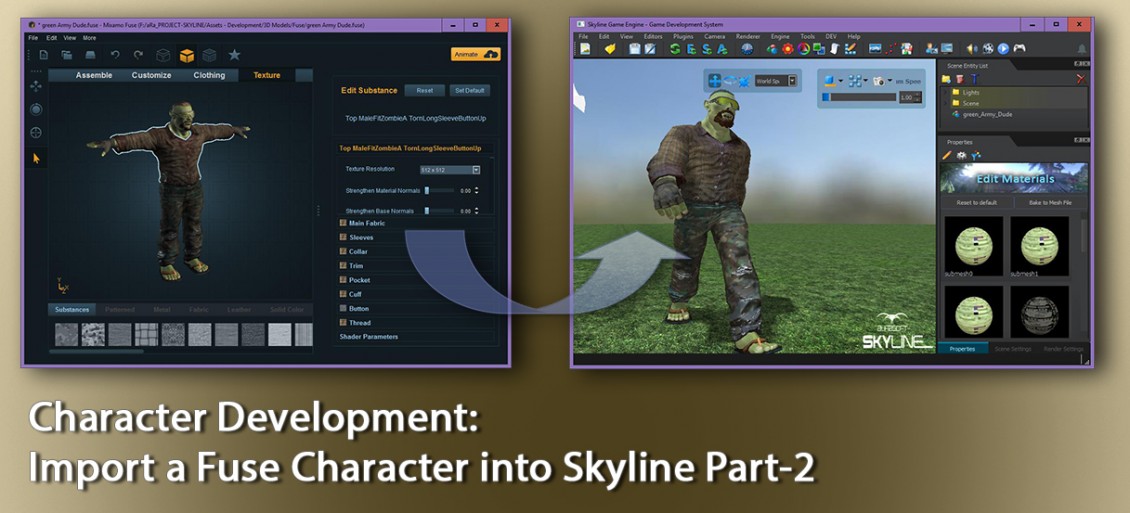
Welcome to part two of this exciting installment, well may be not that exciting but with this knowledge you will be creating some exciting games with your new characters taking center stage.
We have already looked at how to get our characters from Fuse to the mixamo website and back to the computer complete with animations. If you are unsure what this is all about I do recommend that you read part 1 of this tutorial to bring you up to speed, as in the following sections we will be bringing life to your creations and have them running around inside your Skyline scene. Piece of cake! no really, its not that hard I will show you how.
Skyline provides a quick asset manager tool that will automatically convert your character fbx files into ready to use Skyline static asset. Then with a little magic we will have the models come to life with your new animations.
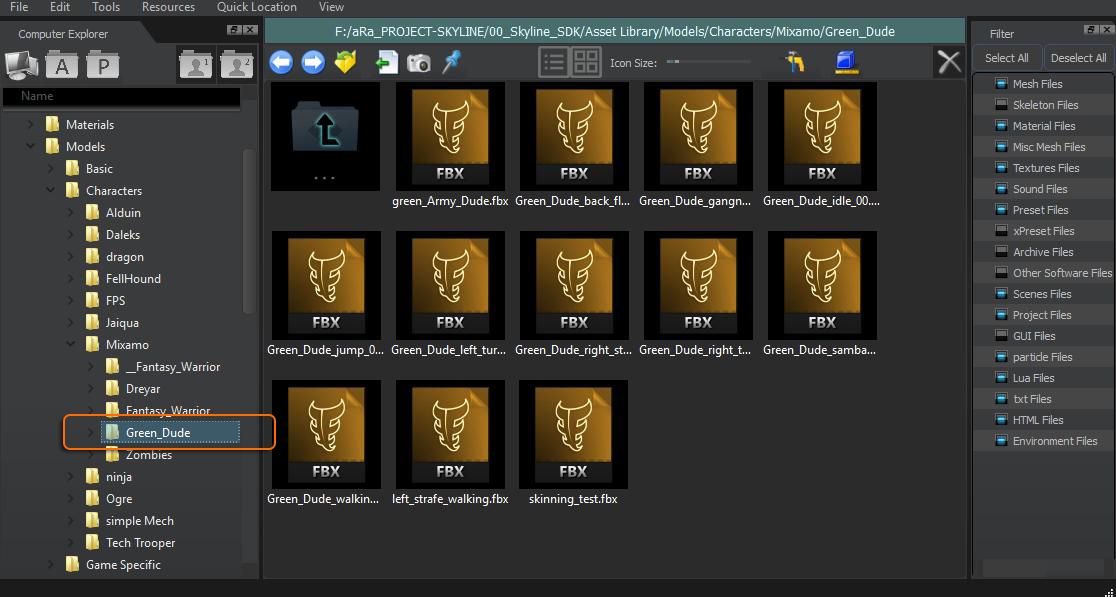
At the end of the part-1 we unzipped the downloaded files into a folder in the asset library, you will need to locate this folder inside Skylines Asset Manager. When you click on the folder for the first time Skyline will ask if you would like this folder to be added to the asset resources, click "OK" to continue.
Then use the Right Mouse Button to open the folder menu and locate the Resources Management>Prepare Folder For Skyline option This will create all textures, materials and meshes from the provided fbx files. Any animation fbx's will be left unopened.
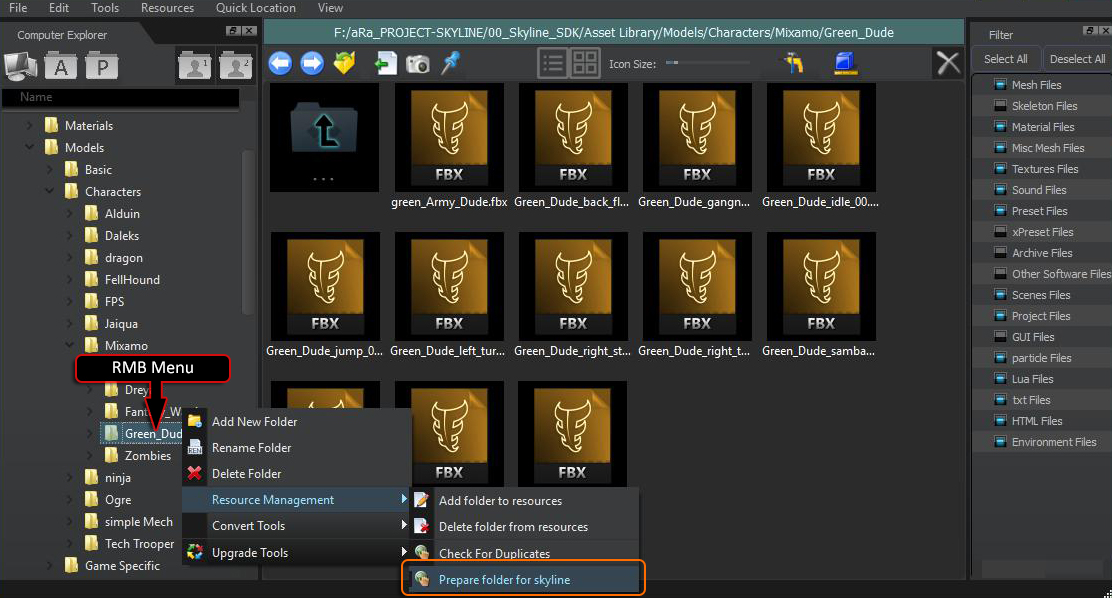
You will be provided with some options just go with the defaults for now and click "OK". After a few mins your folder will refresh displaying the converted assets.
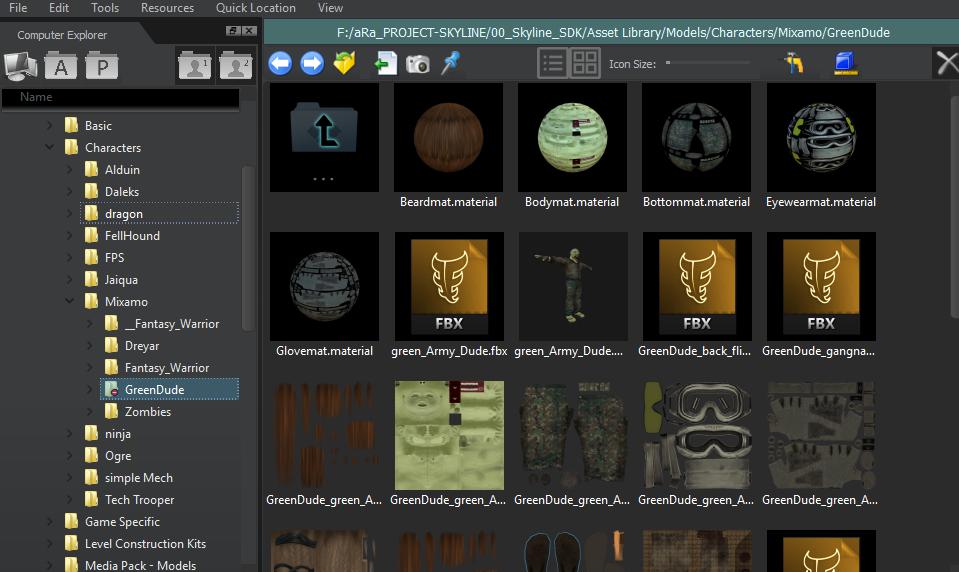
Select and drag into your scene the character mesh, easy to see as there will be a small thumbnail created for you. Note when the character is loaded in the scene it will be 10 times bigger. Generally with most non character assets, Skyline can auto scale these on folder preparation but with characters they will need animation files added and these can not be scaled until after they have been added to the character. We will be looking for a better way to improve this in future Skyline updates.
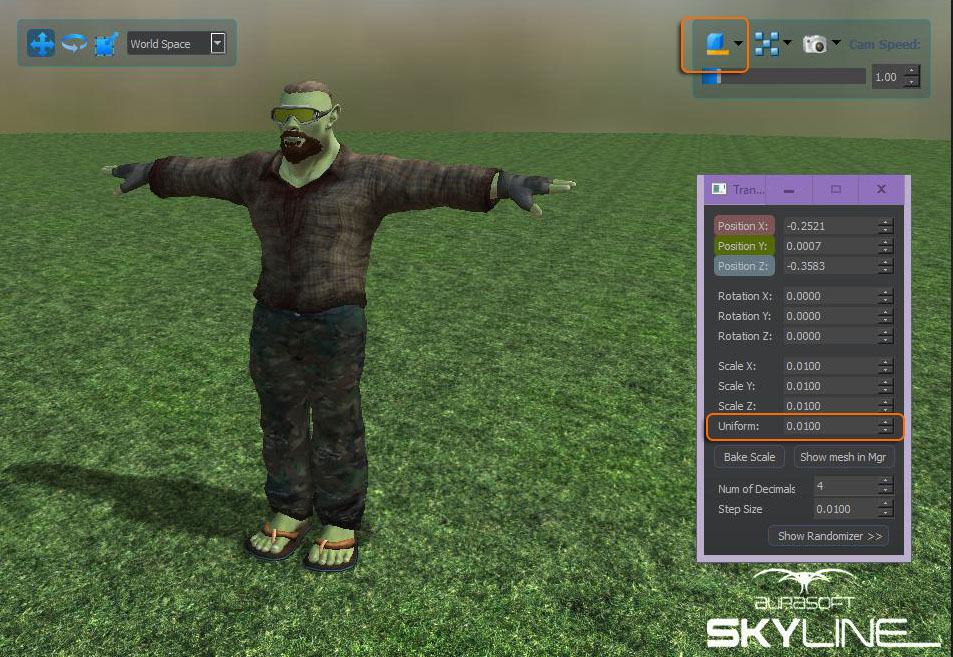
With the character selected in the scene, open the translation utility and set the uniform scale to 0.01 this will just make it easier to see the character as we set its animations. Note this is a temporary scale, once we have set up the animations we will scale and re-bake the mesh so that it will always be at the correct scale in the scene.
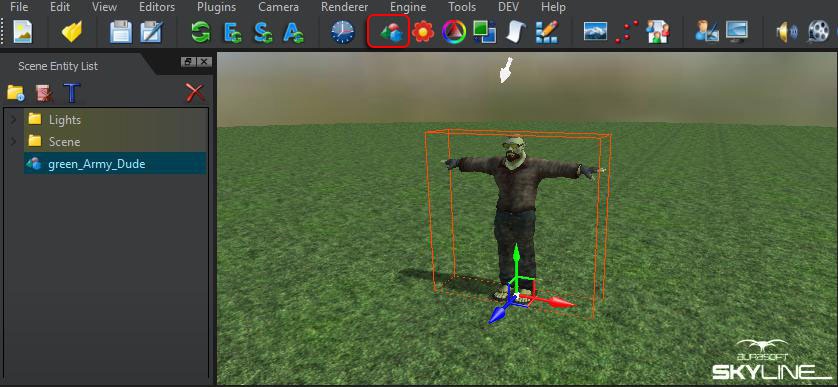
To add the animations we will need to use Skylines mesh editor. To open the mesh editor, select from the toolbar the following icon: Oh and make sure you select the character in the scene.
Once you have the mesh editor open select the import button to bring in the selected character for editing.

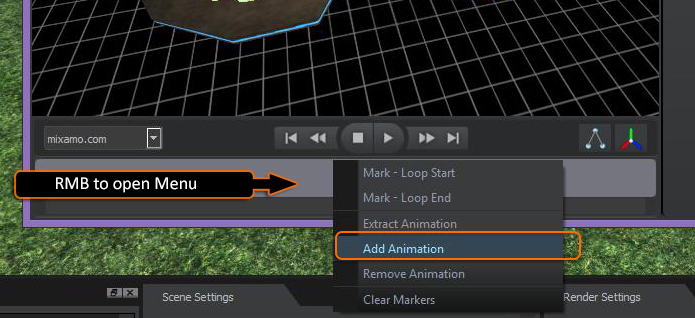
At the bottom section of the mesh editor there is a blank area ready for creating our animations. RMB in this area and select the "Add Animation" option.
Locate your character folder and select the "character_walking_inPlace_00" animation, your name will obviously be different and in the next box that opens type in the name you want to be associated with this animation.
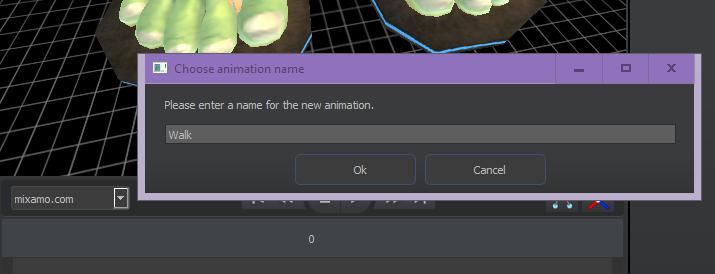
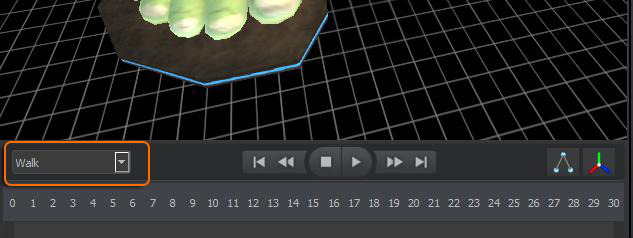
Your new animation will now be shown in the animation drop down.
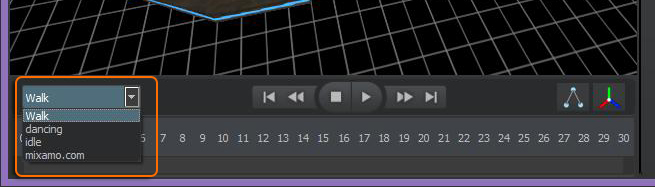
Repeat the steps until you have imported all of the animations you want to use on this character. Once you have all of the chosen animations added the dropdown will show them.
Now we have all anims in place one more task will be to resize the model to be in scale with Skylines units. Still in the mesh editor open the property "Mesh File Editing" and set the "Scale Offset" to (0.01 0.01 0.01) Dont forget to press enter!
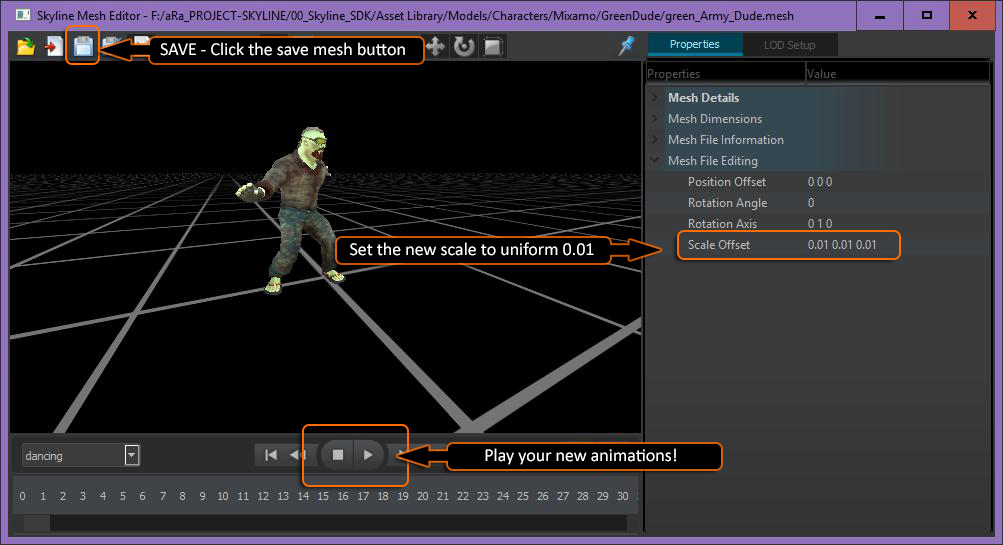
You can now zoom into the character (middle mouse wheel) and play the new animations. When ready press the "Save to Mesh" button to save all the changes back the the character mesh for later use. Now that the mesh is saved you can close down the mesh editor.
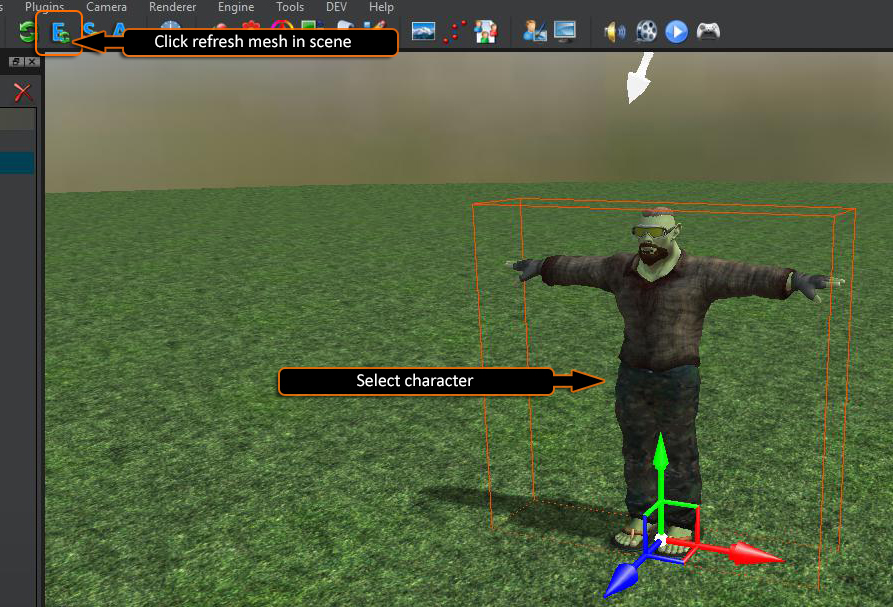
To bring the current character in the scene up to date, press the "reload entity" button from the scene editor toolbar. This will ensure it now uses the new character mesh we just edited and not the one in memory.
Some of mixamo's character texture uv's may require the normals to be flipped in the material. This will make the normal map shading look wrong as the simulated lightfall will be upside down. The fix is easy!
You will be wanting to tweak the materials so ensure the character is selected in your scene and open up the material editor. Select each sub material in turn and set its "Normal Map - Flip Vertical" option to checked.
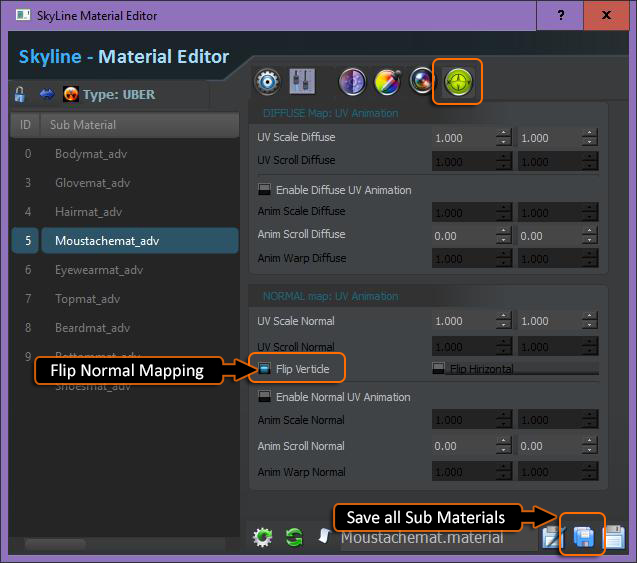
Now make adjustments to each sub material so that it looks how you want it to look. It is now important to save all the sub materials so we don't lose any changes.
Note: Dont forget to Save all Sub materials see image above.
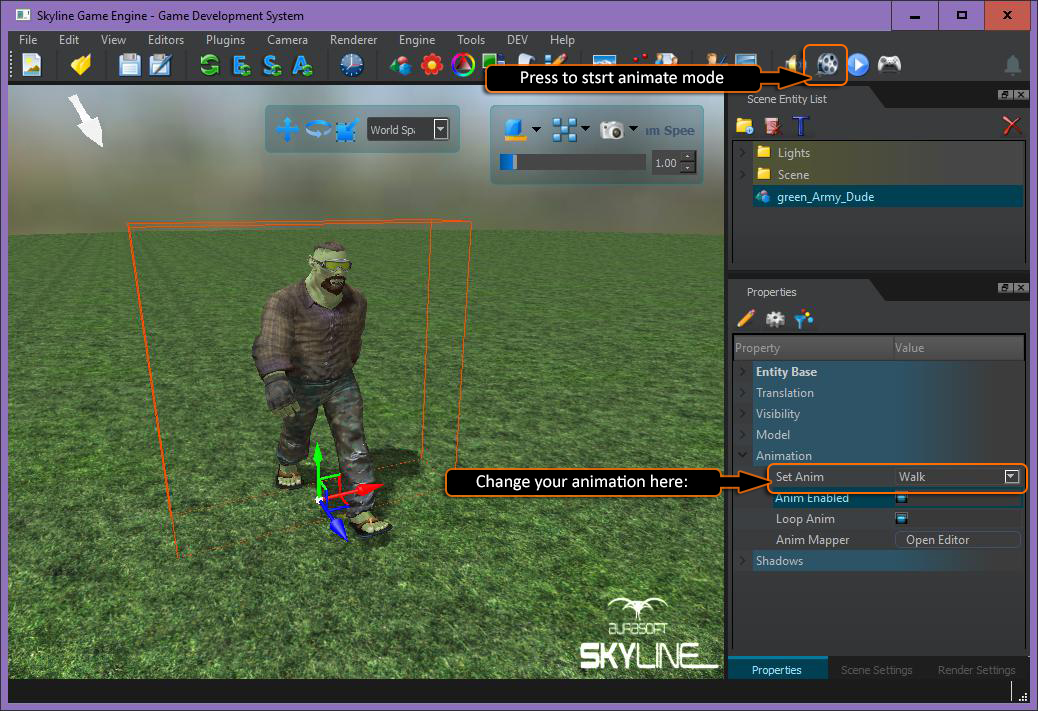
Now press the scene animate button to see you animations.
That about brings this tutorial to an end. We have seen how to get a character developed in Fuse to have animations from the mixamo site and import these into Skyline. We have also looked at some of Skylines Mesh editing tools to combine animations onto a character.
Next up would be adding your character controller scripts, ai or other fun goodies and start up some cool game action!
Hope you have enjoyed and found this tutorial helpful, Happy Skylining :)
Thank you for reading and see you out there in cyberspace ....

Leave a Comment